What is the AddressBook used for?
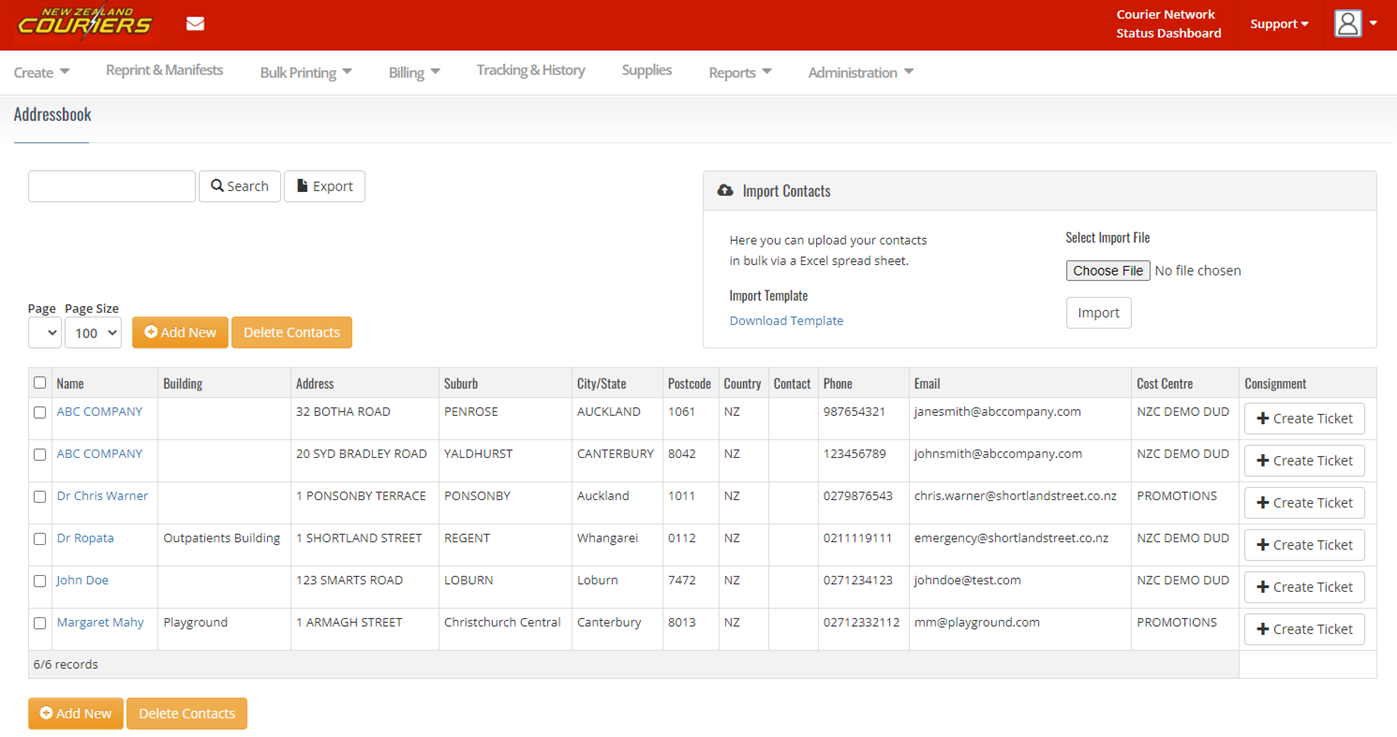
The Addressbook is where you can import and manage your company’s address book, including:
- Find and download the address file import template
- Import and validate an address book
- Create new validated addresses (Add New)
- Delete Addresses (Delete Contacts)
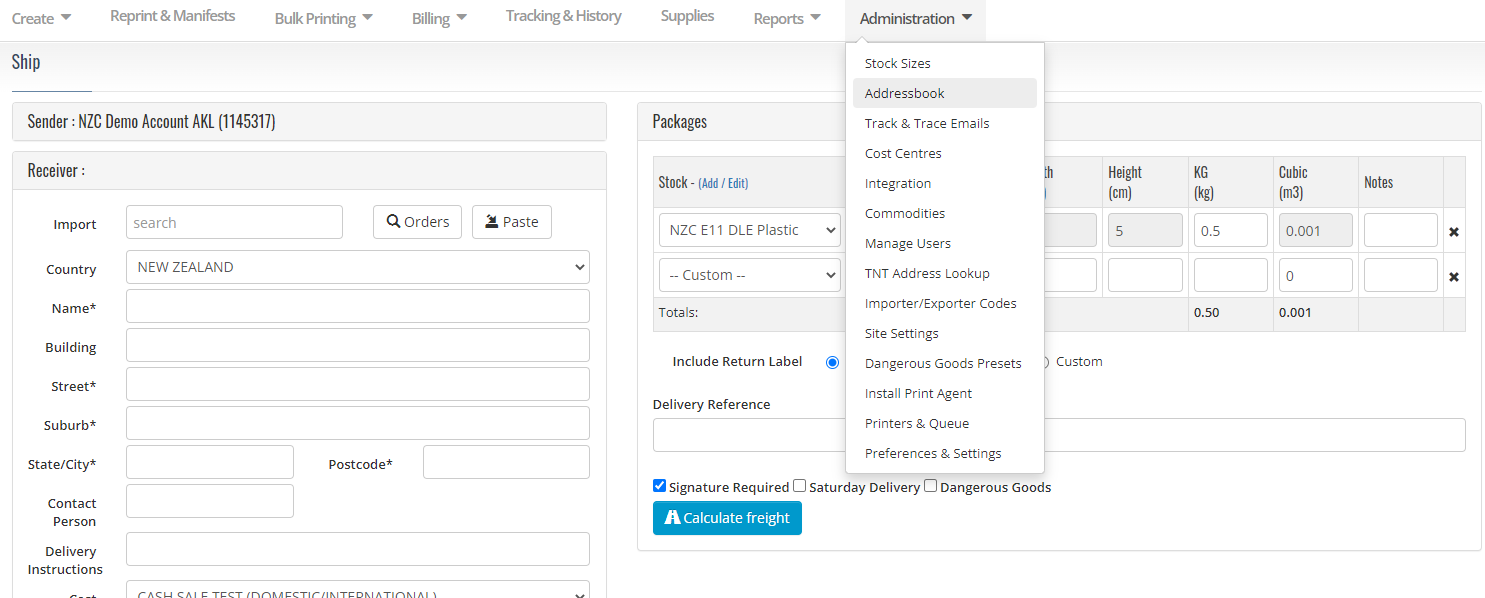
The Addressbook is located under the Administration tab on your GoSweetSpot homepage.
How to add new addresses manually
- Click Add New

- You will be directed to the Edit Contact screen to complete the contact details
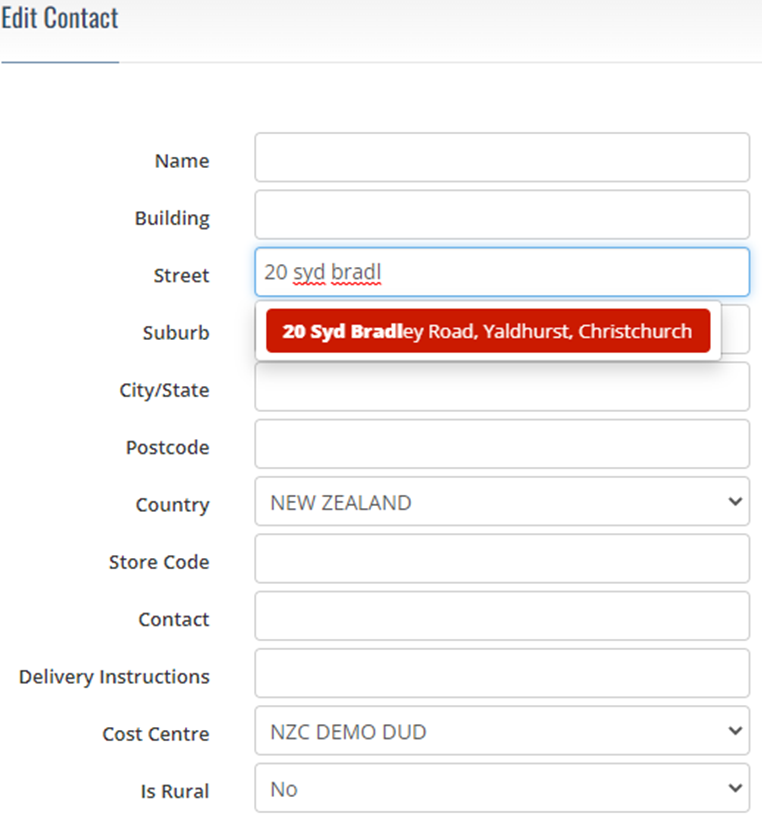
What does each field mean?
| Field | Description |
|---|---|
Name |
Business or Receiver’s Name |
Building |
E.g., “Freightways House’ |
Street |
The street will autocomplete as you type Important: Please use an autocompleted address as this is the validated address and will auto-complete the suburb, city/state, and postcode fields. Please do not override these fields as this will result in an unvalidated address and unvalidated addresses may attract additional charges. If you are unable to find the address at the street level, you can move to the suburb field and select a validated option from here. If you cannot find a validated suburb for the street address, please contact your Account Manager. |
Store Code |
Enter a store code here if applicable |
Contact |
Receiver’s name (if the item is being delivered to a business address) |
Delivery Instructions |
E.g. ‘Deliver to Reception’ |
Cost Centre |
Select the default cost centre for this address |
Is Rural |
If the address is classed as rural / non-urban, you can flag it here. Note that the system will still check the service on the validated address at checkout if this is not selected. |
- Once you have completed the address details, you can set your contact's notification and service preferences.
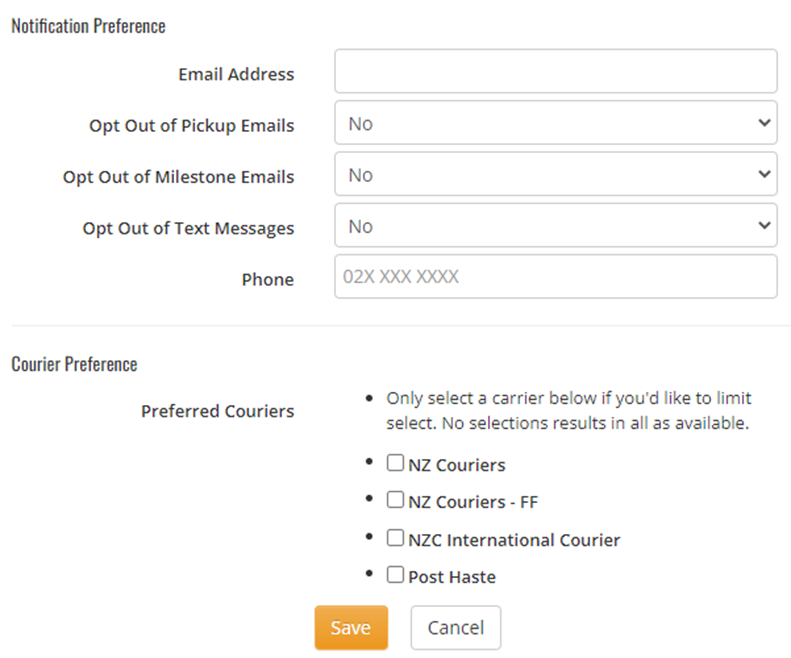
- Pickup Emails This is an email sent to the specified email address when the item is scanned as picked up by your New Zealand Courier's driver.
- Milestone Emails Two emails are sent to the specified email address, one when the item is scanned onboard by the driver and the second when the driver scans the item as delivered. The ‘onboard’ email gives the receiver to option to provide permission to leave and delivery instructions for the driver.
- Courier Preference As stated, only select a carrier if you would like to limit the available carriers for this particular contact. E.g., If your customer only wants to receive their items on an overnight service, you will select ‘NZ Couriers’.
- If you want all sending options available, do not select anything.
- Once you are happy with your notification and service preferences, select Save

Importing an Address Book
Downloading the address template file and importing it back into the GoSweetSpot system.
Download and prepare the address import template
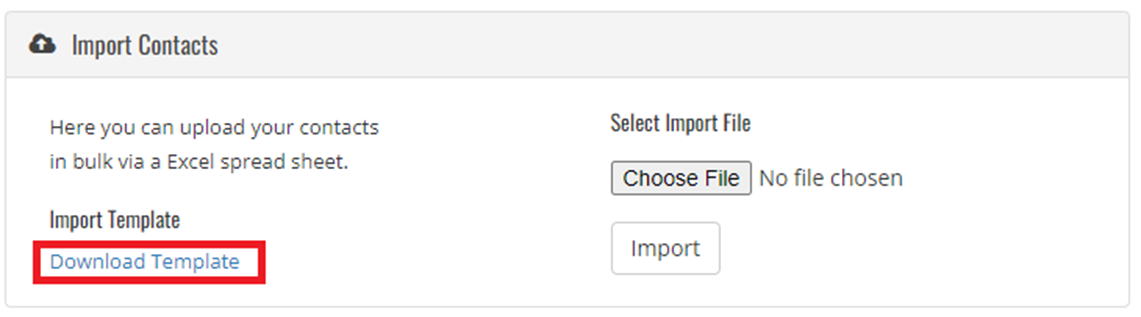
- To import an address into your NZC GoSweetSpot system, click on the Administration tab, then Addressbook tab, then select ‘Download Template”
- Once you have downloaded the Import template, you will be presented with an excel sheet in the following format.

-
Postcodes are mandatory, and without them, addresses will not be validated. Postcodes are 4 digits and start with a ‘0’. You will need to change the format of the Post Code column to ‘Text’ in Excel. Otherwise, the 0 will drop off the front of the postcode, and it will not be recognised.
Note: Ensure when completing the import template, you put your address information as per the above format and save it to your documents; when you are ready to upload, you will browse from the document files you have created and saved.
Upload Addresses from Import Template
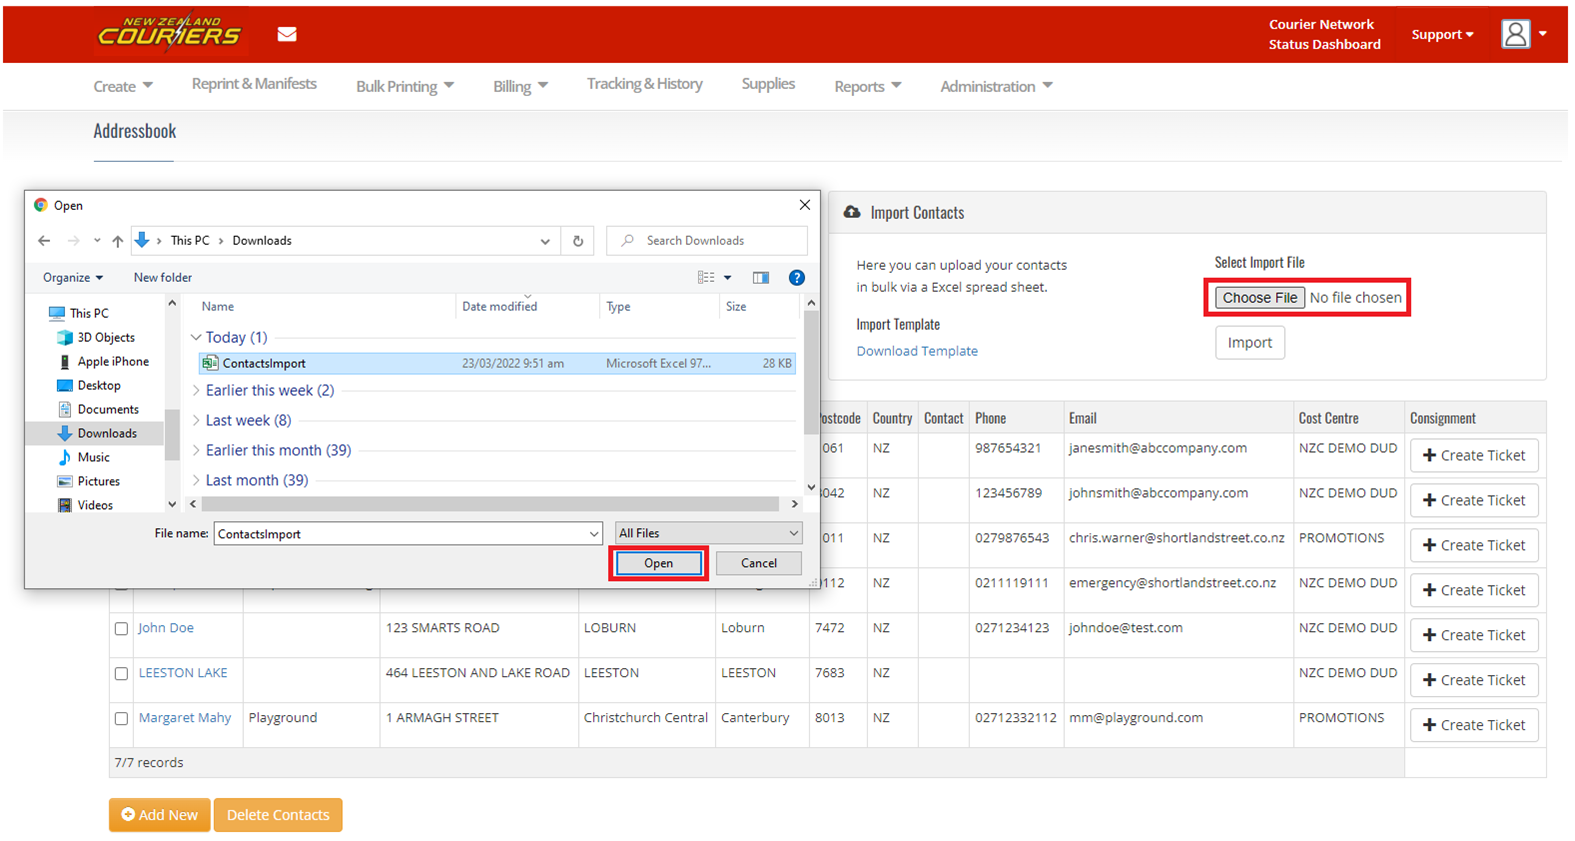
- To upload your address template into GoSweetSpot, click on the Choose File, which will bring up the options box
- Select the required saved file and double click or select Open
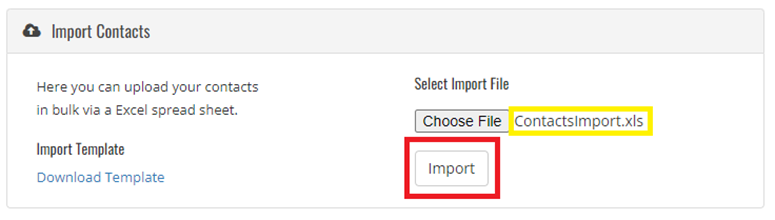
- Your file will then display as follows (highlighted in yellow). To start the import, click on the Import button.
- You will see the screen below if your address book contains no errors and all contacts can be validated. The details of your address book will be displayed below (see highlighted in red), confirming no errors were detected. You can now select ‘Import validated contacts’ to upload your addresses to your address book

- If your address book does contain errors to be fixed, but you would like to fix these at a later date, or you decide you do not need to include these with your address book, you can still import the validated contacts by selecting Import validated contacts. This option will ignore any addresses that need to be fixed; these will not be added to your address book.
How to fix errors
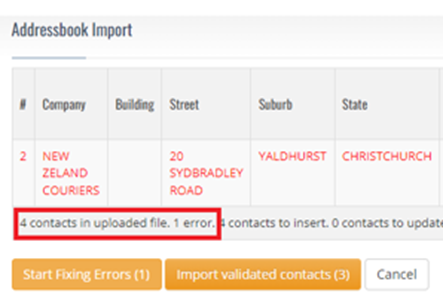
- If there are any errors with your addresses, these will display highlighted in red. It will also tell you how many contacts were found in the file and how many of these returned an error (see the red box in the image below).

- To fix the errors in your address book, select ‘Start Fixing Errors’, and you will be taken to the screen to the left.
Start by editing the ‘street’ field; as you edit, a drop-down box will appear with the validated address options. As you can see in this example, the road name was spelt incorrectly

Skip |
If you cannot find a suitable match, or if you decide you do not need this contact / address saved to your address book, select ‘skip’, and you will be brought to the next address to fix. |
Cancel |
If you cannot complete the task of fixing the addresses at this time, select ‘cancel’ to take you back to the Address Import page (above). |
Save & Continue |
When you have fixed the address, select save and continue. |