What are GoSweetSpot Shipping Options?
- Define rules based on shopping cart value, and weight of products in the cart, or simply mark up your current rates.
- Apply surcharges for residential or outer area (rural) deliveries as validated by us based on the address.
- Offer multiple shipping options to your customers.
We take care of managing the shipping zones for you. You simply select the zone and set your rules.
After installing this app, you will be able to enable Carrier and App Rates for your checkout workflow. This can be used to complement your existing shipping matrix or replace it.
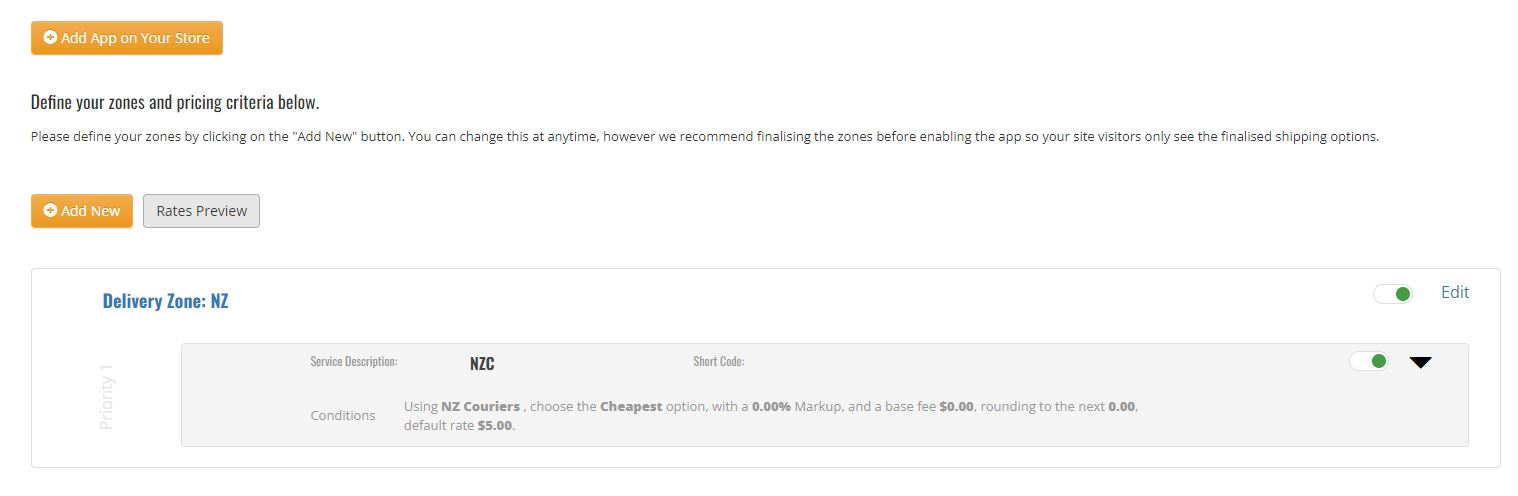
Step 1. Add a Delivery Zone
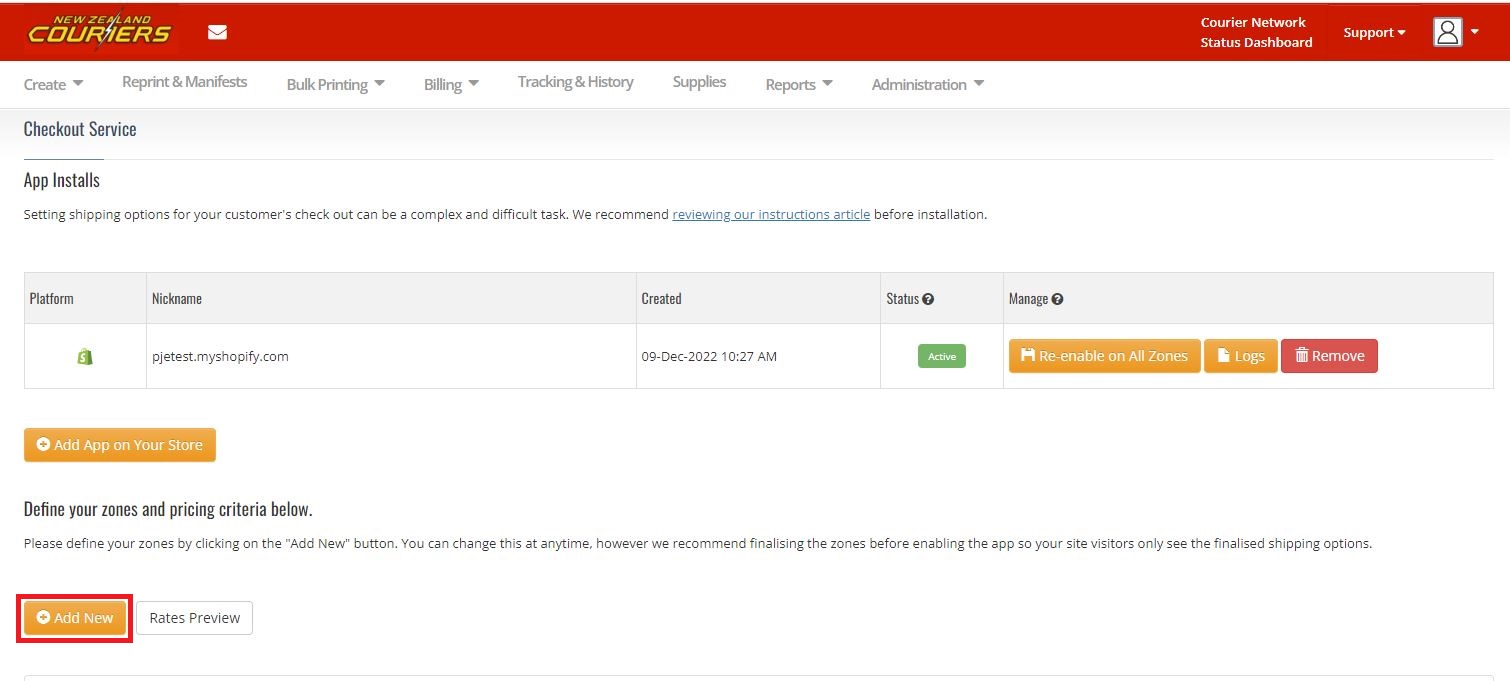
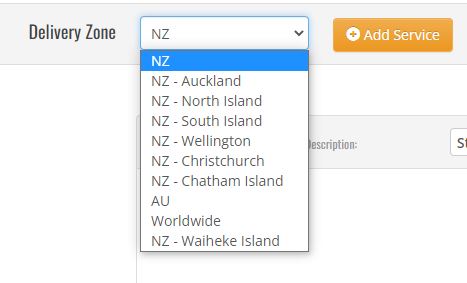
Once you are on the Shipping Options settings page, start by adding a delivery zone. You can do this by selecting the 'Add New' button, which will allow you to set a zone and add pricing conditions and then select which Delivery Zone you want to set.
Step 2. Add a Service

By default, a service called 'Standard Shipping' will have been created when you added it in the previous step. You can rename the service description, set a default rate and define a short code.
| Field | Description |
| Service Description | What will display at check out for the defined zone, so you may want to call it 'North Island Shipping' if you only have one or perhaps 'Express Shipping' if you are going to have multiple options for the customer. |
| Default Rate | Will only display if none of the criteria is met (explained later), and you can. |
| Short Code | It can be left blank unless you want to use it for reference. |
Step 3. Add Pricing Criteria
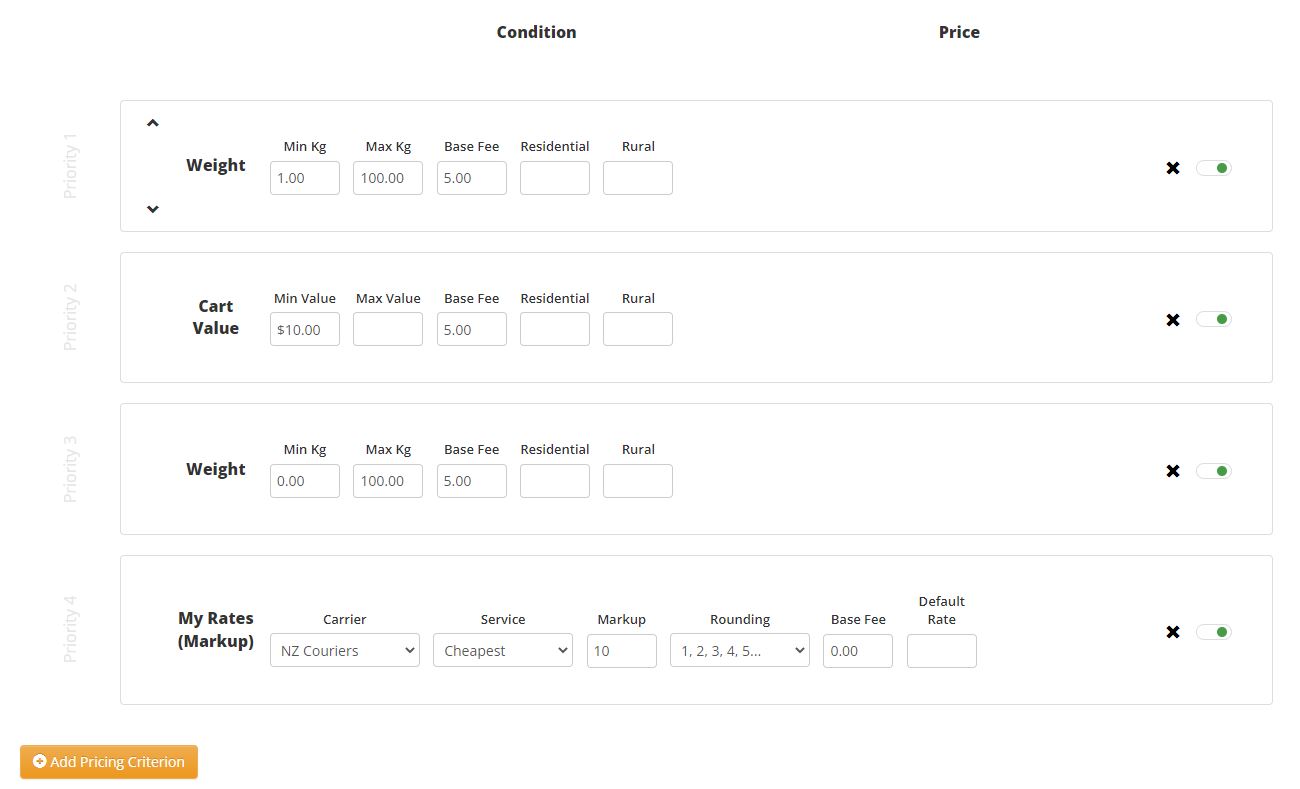
There are three types of pricing criteria to choose from: Weight, Cart Value and MyRates (Markup).
| Field | Description |
| Weight | A 'Weight' pricing criterion will have been created for you by default. It also has buttons to edit, remove (x) and enable/disable. The above image means: If the weight of products in a customer's shopping cart is between 0kg and 100kg, then the price displayed at check out will be $5.00. It also means that if the address were rural or residential, a $0.00 fee would apply. Note: GoSweetSpot determines a user's zone and whether or not it is rural or residential. Add multiple breaks: by adding a new pricing criterion, selecting Weight, and then setting a new weight range. |
| Cart | The Cart Value criterion allows you to set a shipping price based on the total value of products in the shopping cart. Click Add Pricing Criterion and select Cart Valuefrom the drop-down menu. You will be prompted to set a minimum and maximum value, base fee and surcharges for residential and rural. Setting a minimum value of $10 and a maximum value of $50 will mean that any order with a total cart value within that range will display the base fee plus applicable surcharges. |
| MyRates (Markup) | If you don't wish to define shipping prices yourself (based on weight or cart value), the system can display a price based on a markup of your current rates. MyRates (Markup) allows you to select the cheapest or fastest courier, add a markup, round the resulting price and add an extra base fee if you choose.
Note: Rate is based on the products weights set up in your Shopify site. If you do not have weights set up to your Shopify products it will not work. Shopify does not have a field for volume/size and only allows weights. If the size of your box is greater than the weight (at a ratio of 200kg:1m3), you would want to use the equivalent weight (volumetric weight) for the product weight in Shopify. |
Multiple Pricing Criteria/ Priorities
Add multiple breaks: by Clicking Add Pricing Criterion, selecting Weight, Cart Value or My Rates (Markup).
The system will prioritise the first criterion, and if that condition is not met, it will go to the second (if none of the criteria is met, it will display the default value).
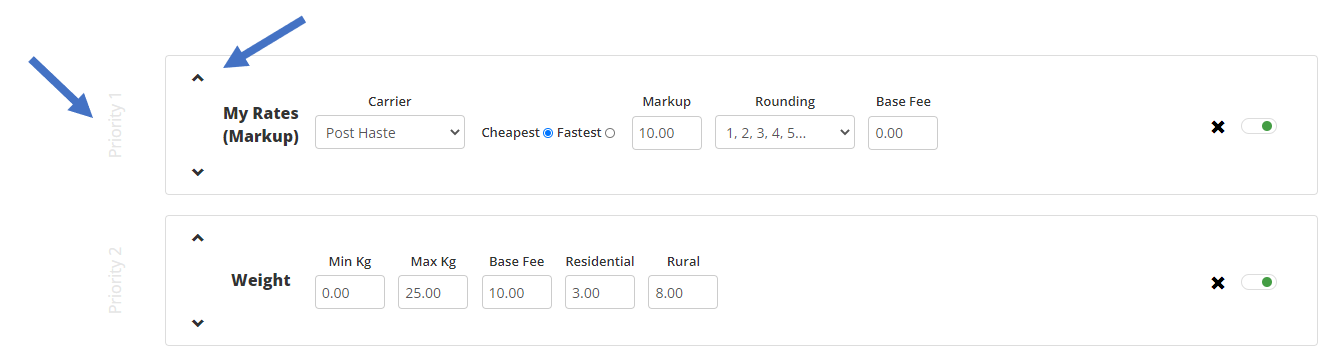
You may combine any of the above criteria and then set the priority of those criteria by using the arrows (notice the priority number on the side).
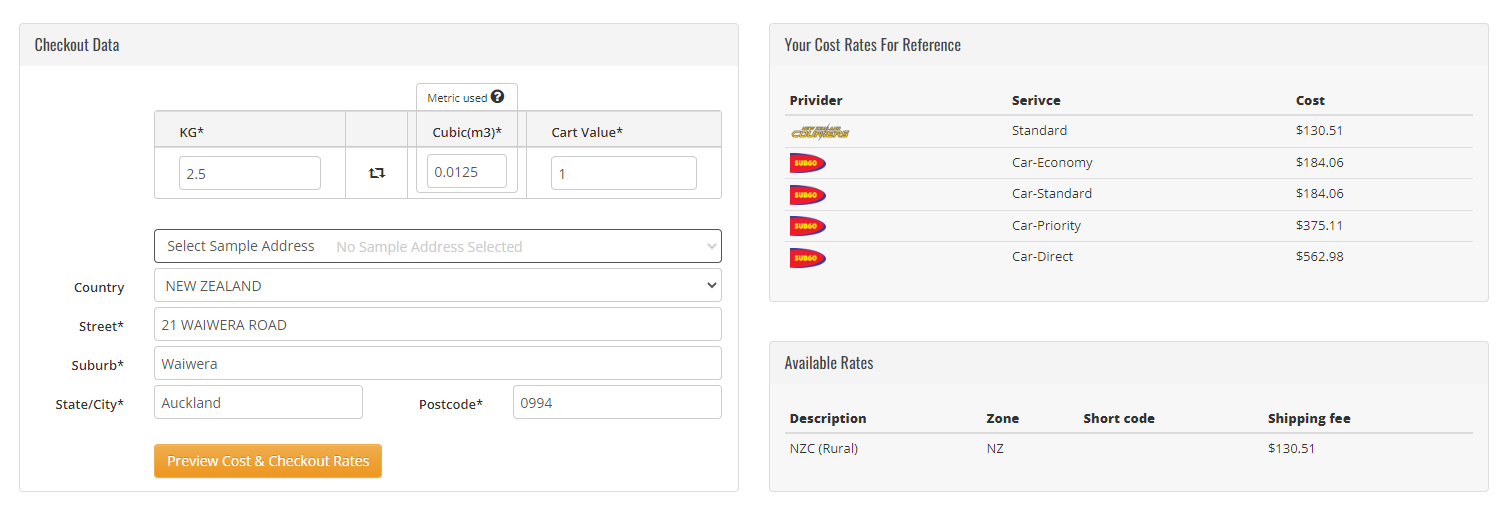
Step 4. Rates Preview
After you have created your zones, services and pricing criteria it is time to test the results. You can do this by clicking the 'Rates Preview' button:

Enter in a weight and cart value and select an address you wish to test for. On the right hand side of the screen you will see a section called 'Available Rates' which will display the results of your set up.
Step 5. Link to eCommerce Platform
Once you are happy with your conditions, the next step is to link our app to your eCommerce.
Find out how to integrate with Shopify and Woocomerce.
Step 6. Remove Existing Rates & Test
Once you have installed the application on your platform, you will potentially have both our rates and your existing rates on your website.
We recommend going to your website, adding some products to your cart and going to check out. Enter some address details for shipping and test to see if what you expect happens. The GoSweetSpot Shipping Options will be the same name as the Service Description entered below (the rest, if any, will be what you already had set up).
If it all looks correct, remove your existing rates (assuming this will replace them), and you are done!